- Download the Add-on.
Obtain the Liquifeel_v1.3.zip file from BlenderMarket or GumRoad.
- Add Liquifeel to Blender!
Blender 4.0 or later is required to run the add-on correctly.
Launch Blender and navigate to Edit > Preferences in the menu. In the Preferences window, switch to the Add-ons tab.
Click on the drop-down menu and choose Install from disk… button and navigate to the location where you downloaded the Liquifeel_v1.3.zip file.
Select the file and click Install from Disk. - Activate add-on:
Use the search bar in the Add-ons tab to find “Liquifeel.”
Check the box next to the Liquifeel add-on to activate it.
Click Save Preferences to apply the changes. - Accessing Liquifeel:
Once installed and activated, Liquifeel can be accessed in the N-menu Panel.
Understanding the UI
The Liquifeel Add-on has 4 main tabs:
- Geometry tab: for controlling the liquid.
- Shading tab: for customizing materials.
- Condensation tab: for adding condensation to your glass.
- 3D Assets tab: for choosing a preset liquid container.
3D Assets Tab:
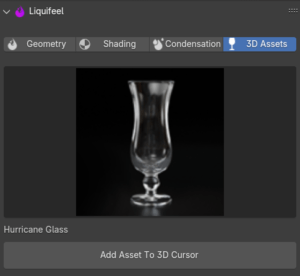
- Go to the 3D Assets tab.
- Choose a preset liquid container from the available options.
- After selecting the asset, add it to the 3D Cursor in Blender.
Geometry Tab:

- In the Geometry tab, locate the “Fill Active Object” option.
- Click on “Fill Active Object” to apply the liquid to the selected object.
Shading Tab:

- In the Shading tab, you can choose to shade both the container and the content inside it.
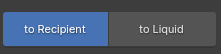
- Select between the options: “To Recipient” and “To Liquid”.
- Choose from the Material Library or add your own materials to customize the shading.
Condensation Tab:
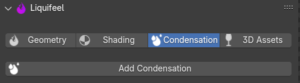
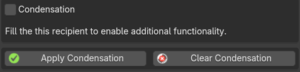
- In the Condensation tab, you can toggle the condensation for your asset on/off.
- Adding Liquid to straight-opening recipients
To add liquid geometry to a recipient mesh that has a horizontally straight opening (mouth), select the mesh and click
By default, the Opening Type is set to Straight
Mesh Geometry requirements for operator to work correctly:
a. Mesh must be Single island (the recipient’s topology is represented by a single contiguous set of faces that are connected by edges and vertices)
b. Recipient mesh must have thickness.
c. Recipient mesh must be concave and the opening (or mouth) should be pointing upwards.
d. Recipient must have realistic scale
e. Object should not be an instance and should have applied scale and rotation. - Liquid Amount
Control how much of the recipient is filled by adjusting the Liquid Amount slider
By default, the Liquid Amount is set to 50. This represents a percentage of how much of the recipient’s volume is filled, from the bottom to the opening (where liquid would overflow). - Adding Liquid to irregular-opening recipients
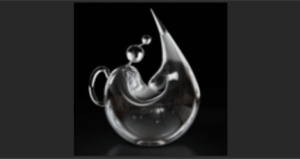
If the object respects the requirements above, yet when clicking Fill Active nothing happens, the recipient might have an opening that is not horizontally straight and needs a different algorithm. For example, if it’s a carafe, it might have a draining beak.
In that case, Irregular opening has to be selected from the Opening Type dropdown and the Lip Threshold amount has to be increased until the liquid geometry appears.
Example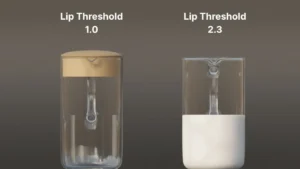
In this case the carafe was filled only when the Lip Threshold was adjusted to 2.3. Increase the Lip Threshold progressively until the liquid geometry appears, if the object appears to have an irregular opening. - Liquid Behaviour
Once liquid geometry has been added, the algorithm simulates how liquids behave in reality when the recipient is inclined (rotated).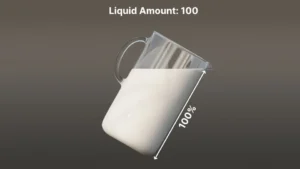
- Seal Container
If checked, the Seal Container option disables the liquid draining at the opening. Therefore, the liquid now appears to have an invisible lid blocking it from flowing out. Useful for instances where you want the liquid to stay inside even after rotating the recipient, like for example when you want to place a capped bottle on its side.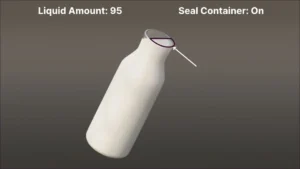
- Hide Recipient
If checked, the recipient will be hidden, only showing the liquid inside it. - Hide Liquid
If checked, the liquid inside the recipient will be hidden, appearing without liquid.
- Shading an asset without filling
To apply a shader from the Liquifeel material library to the selected object, click Shade Active in the Shading Tab

- Selecting the library
Liquifeel comes with two libraries of shaders: Liquids and Solids. You can switch between them by accessing the Library dropdown.

Additionally, you can select “Scene Materials” which gives quick access to all the materials already in the scene.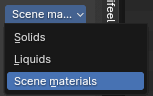
This is important, because once an asset is shaded using Liquifeel, the material in the material slot should not be manually changed in Blender’s standard interface. Scene materials are also made available through Liquifeel’s interface and should be added through this functionality - Selecting the Shader
To select a shader from the library, click on the large thumbnail.
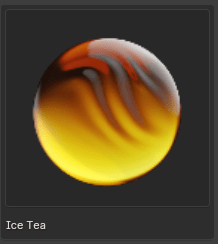
A dropdown will appear to give you access to the various shader presets in each library.
Beneath the thumbnail, you will see the name of the currently selected shader preset. - Shading a filled object
To apply a shader from the Liquifeel material library to the selected filled object, click
Two extra buttons (selectors) will be available for objects that have been previously filled, which determine to which mesh the shader is applied.If the “toRecipient” selector is active, the shader is applied to the surface of the original mesh.
 If the “toLiquid” selector is active, the shader is applied to the generated geometry inside the original mesh.
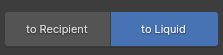
- Modifying Presets
Shader presets come with a variety of settings that can be altered.

The number and type of settings are different between different shader presets.Some common settings for shaders in the Liquids library are:
Color
Sets the main color of the shader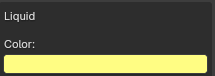
Foam Amount
Determines how much of the liquid height is represented by foam. Increasing the amount will convert more of the liquid to foam, starting from the top and expanding downwards.
The foam amount is relative to object size and total liquid level, therefore it is necessary sometimes to increase the amount until it becomes visible.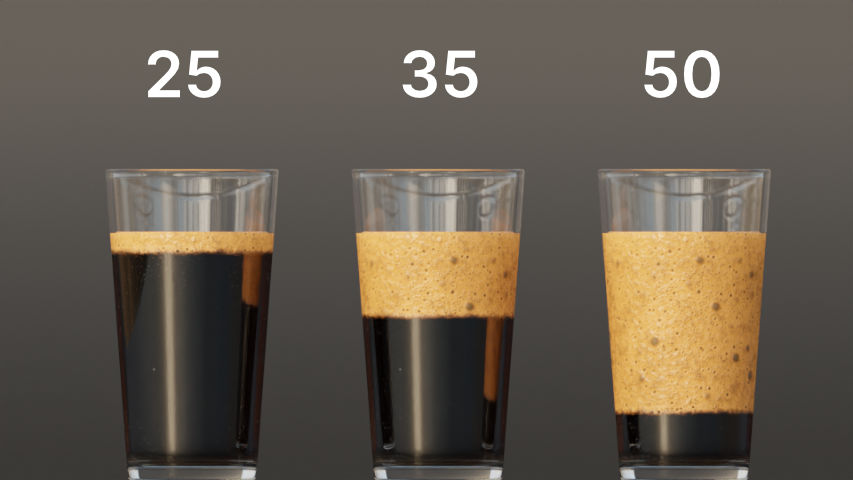
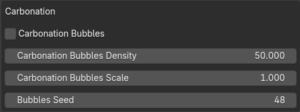
Carbonation
Determines whether the liquid contains carbonation bubbles. If checked, two more controls become available – Amount and Size.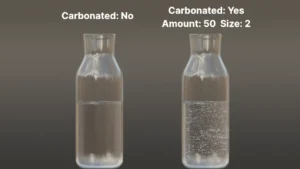
Other settings can include turbidity, color intensity, etc. Some are specific to a single shader preset.
Understanding Uber Glass Material
The Uber Glass material consists of 3 customizable sections:
- Glass
- Pattern
- Custom Roughness Map
Customizing Glass Section:
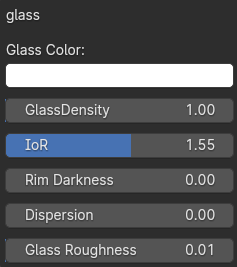
- In the Uber Glass material, locate the Glass section.
- Adjust parameters such as glass color, index of refraction, rim darkness, dispersion, and glass roughness to achieve the desired appearance for the glass material.
Customizing Pattern Section:
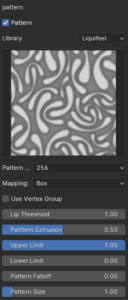
- Utilize this section to add a pattern to the glass.
- Choose between using a preset texture or your own texture; you can switch between the two different approaches based on your preference.
- Adjust the texture resolution to control the quality of the applied pattern.
- Determine the texture extrusion to define how much the pattern protrudes from the surface of the glass.
- Customize the pattern size and its limits to control the scale and distribution of the pattern on the glass surface.
Customizing Roughness Map Section:
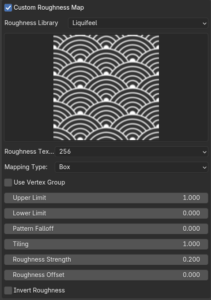
Use the Custom Roughness Map section to further fine-tune the roughness of the glass surface by applying a custom roughness map.
Understanding Uber Liquid Material
The Uber Liquid material consists of 5 customizable sections:
- Liquid
- Foam
- Secondary Foam
- Smoothie
- Carbonation
Customizing Liquid Section:
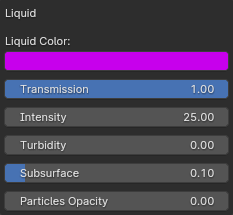
- In the Uber Liquid material, locate the Liquid section.
- Adjust parameters such as liquid color, transmission, intensity, turbidity, subsurface, and particles opacity to achieve the desired appearance for the liquid.
Customizing Foam Section:
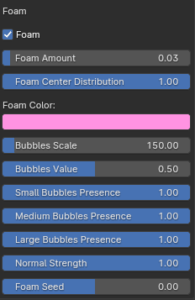
- Configure parameters to adjust the bubbles of the foam and its color.
Customizing Secondary Foam Section:
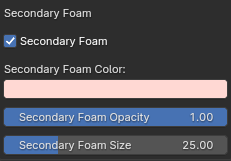
- Utilize the Secondary Foam section to make changes to the general appearance of the foam when mixing with the primary foam.
Smoothie Transformation:
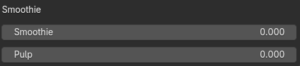
- Explore the Smoothie section to transform the liquid into a smoothie texture, with control over the pulp visibility.
Customizing Carbonated Liquids:
- When using carbonated liquids, navigate to the Carbonation section.
- Customize parameters to adjust the appearance of bubbles in the carbonated liquid.
Adding Recipients from the 3D Assets Library
- To add a Recipient asset from the Liquifeel library, go to

- Then to access the library click on the large thumbnail representing the currently selected asset
- This will open a drop-down window containing the thumbnails of all the other assets. Click on any one of them to select the corresponding asset.
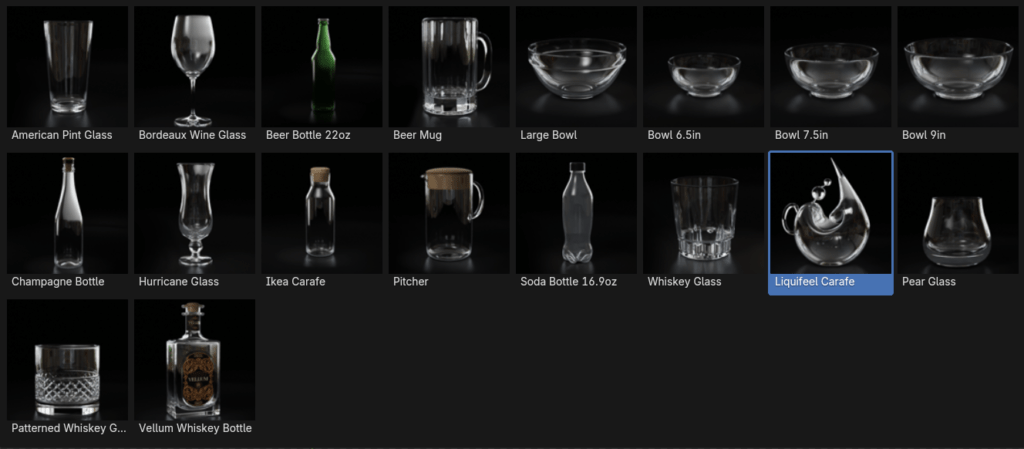
- To add the selected asset to the scene, click

There are various situations when the add-on might not work as you expect. We have compiled a list of common issues, but it may not be exhaustive.
- No liquid is added when Fill Active is clicked
a. Check if the object conforms to the requirements: it should be oriented upwards, have thickness and consist of a single mesh island.
b. Check if the opening is Straight or Irregular: press Num3 or Num1 to go to a side view and make sure the opening is horizontally straight. If it’s not, switch to and increase the value for Lip Threshold until liquid becomes visible.
c. If liquid was added before, then undo was triggered – press Clear before trying to use Fill Active again.If none of these work, contact support via the Discord Channel. We’re happy to help, if we can.
- The upper liquid surface has uneven surface or shading artifacts
a. If the Recipient is rotated, lower the Liquid Amount a little until the surface becomes smooth.
b. Press apply and manually correct the geometry, if a. doesn’t work.